How To Make an RS-232 Loopback Plug for a Cisco Adapter
When dealing with USB to Serial adapters sometimes it’s hard to tell if they are working or you have the drivers properly installed. Sometimes hooking up new equipment will test your sanity, because you don’t know if it’s working or not. So like always you try to separate possible issues to diagnosis the underlying cause.
Verifying that your Com Port is communicating properly, will allow you to focus on the equipment or settings your equipment requires to communicate. However, verifying that the Com Port or USB Serial adapter is working usually requires plugging into operational equipment if you have doubts.
Building an RS-232 serial loopback adapter will allow you to verify that your serial adapter or Com Port is working properly. Since most network technicians have an RJ-45 to Serial EIA/TIA adapter for use with a serial roll over cable, the obvious solution was to make an RJ-45 loopback plug.
The RS-232 serial Loopback plug wiring bridges the CTS (Clear to Send) to the RTS (Ready to Send) serial pins of the 9-Pin D-Sub connector. It also bridges the Tx (Transmit) to Rx (Receive) pins of the 9-Pin D-Sub connector.

Wiring of the Serial Loopback Adapter Plug for a Cisco EIA/TIA Adapter
To make the RJ-45 loopback plug you will need:
- 3” of stranded Cat 5 cable
- Diagonal pliers
- Needle nose pliers
- An RJ-45 end
- Cable strippers
- RJ-45 Crimpers
Step 1 – Strip about 2” of cable shielding with the cable strippers.
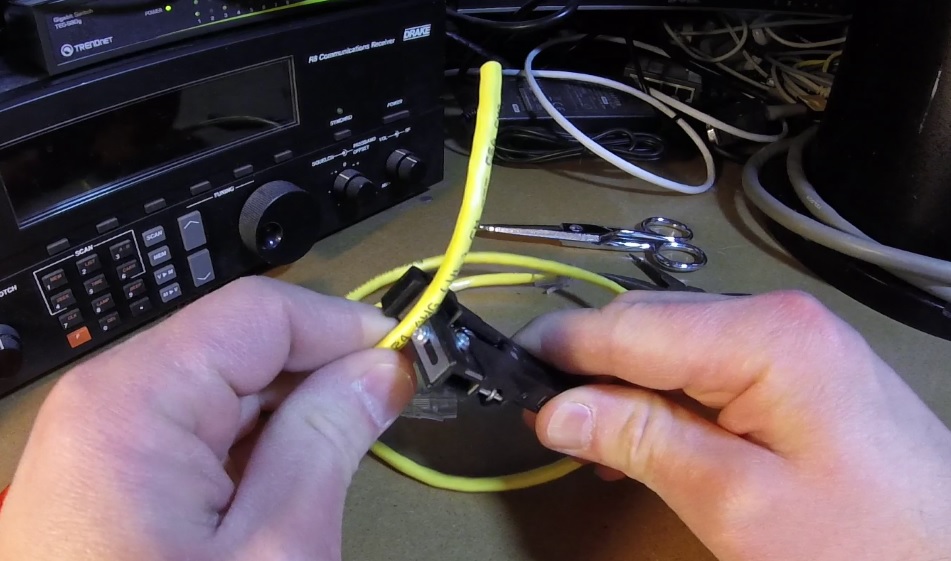
Stripping 2 to 3 inches off the Cat 5 Cable
Step 2 – Cut 2 different colors of wire with the diagonal pliers.
Cut 2 Different Colors Wires about 2 to 3 inches
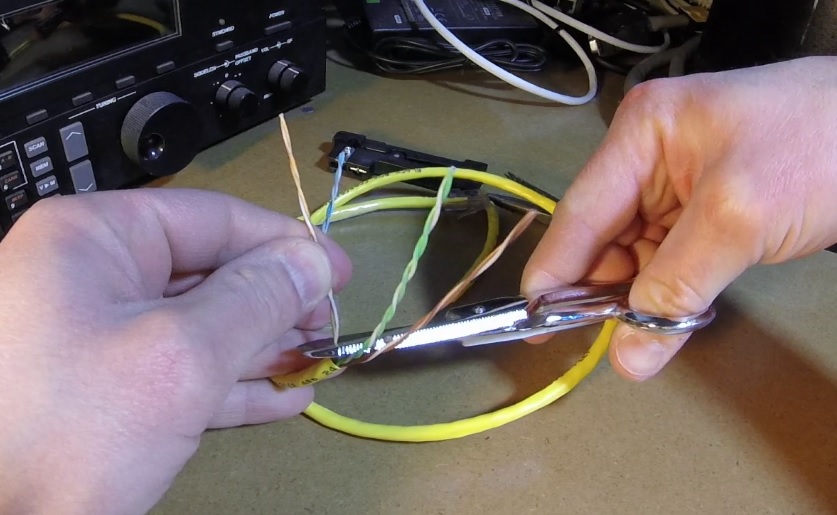
Step 3 – Holding the RJ-45 end, feed the first wire into slot 1 and 8 using the needle nose pliers.
Step 4 – Holding the RJ-45 end, feed the second wire into slot 3 and 6 using the needle nose pliers.

Feeding the Wires into the RJ-45 to Create the Loopback Plug
Step 5 – Double check the wire configuration of the wires, before final crimping.
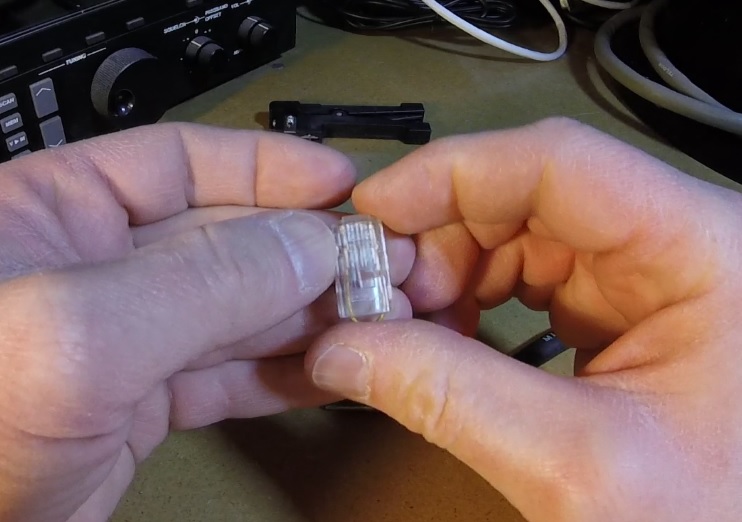
Double Check the Wires in the RJ-45 Before Crimping
Step 6 – Crimp the RJ-45 end with the RJ-45 crimpers.
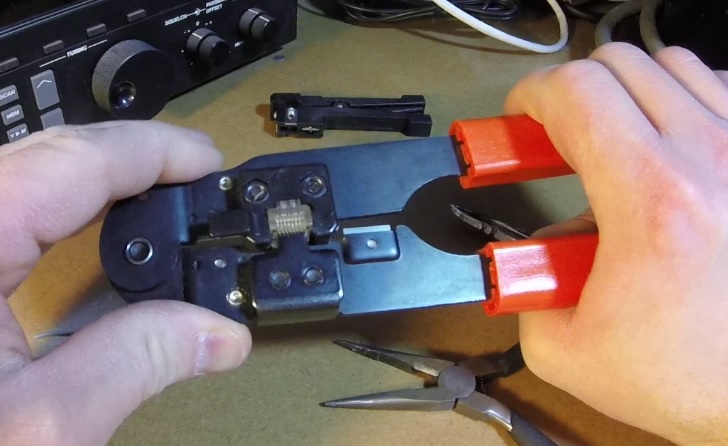
Crimping the RJ-45 to Create the Loopback Plug
Step 7 – Test using PuTTY.


1 Response
[…] Full plans can be found at http://www.networkedminds.com/make-rs-232-loopback-plug-cisco-adapter/ […]